Showing posts with label vegetarian. Show all posts

QUINOA ORZO WITH ASPARAGUS + PRESERVED LEMON DRESSING


Purchasing my first bundle of asparagus each year marks a tectonic shift in our kitchen. I feel ready to let go of heartier soups and starchy roots as I start to dream of the vibrant greens that only early spring can bring. Peas, wild nettles, bright salads, freshness...

Today I wanted to share a super easy dish that lets asparagus bask in its natural glory. Speaking of natural glory... have you tried storing your asparagus in water? It's a great way to keep the spears firm and fresh. I like the notion of treating asparagus like any other spring bloom... maybe I'm just a produce nerd, but I'd be quite happy to get a bouquet of asparagus in lieu of flowers.

INGREDIENTS
  • 1.5 cups uncooked quinoa orzo* (any orzo will do here, or you could substitute a few cups of cooked wild rice for this recipe)
  • 1 bunch asparagus, trimmed and sliced
  • 1 large or 2 small preserved lemons (if you don't have access to preserved lemons - I think using additional fresh lemon juice and fresh lemon zest would make a nice substitution). For details on making your own preserved lemons, here's a recipe for you.
  • 1/2 cup extra virgin olive oil
  • 1 tablespoon fresh lemon juice + more to taste
  • 2 tablespoons freshly grated Parmesan + shaved Parm for serving
  • freshly ground black pepper and sea salt
  • for serving: arugula or chopped parsley; another squirt of fresh lemon juice; shaved Parm or crumbled goat cheese
*A local company named Edison Grainery has been doing all sort of interesting things with grains, specifically organic quinoa. We're addicted to their quinoa crispies and I really like their quinoa orzo.


Fill and large stock pot with tap water and salt very generously. Set pot over high heat and bring water to a boil.

In a large mixing bowl, set up an ice bath for the asparagus.

When the water comes to a rolling boil, blanch asparagus slices until vibrant green and just tender, depending on the thickness of your stalks, this could take 1-3 minutes. Don't pour out the cooking water, simply scoop out tender asparagus with a slotted spoon and immediately plunge the veg into an ice bath. Keep your salty cooking water on the stove and use it for your orzo.

Cook orzo until it reaches your desired texture. (For those of you using the Edison quinoa orzo, I've found that the cooking time is much longer than that suggested on the package.)

While the orzo is cooking, go ahead and make your dressing. A note on preserved lemons: when using preserved lemons, you want to discard the flesh and use only the peel. Rinse the pieces of preserved lemon peel and place them in a blender or food processor. Add olive oil, lemon juice, grated Parm, plenty of ground black pepper and salt to taste. Blitz all ingredients. Taste for seasoning and add a little more lemon juice and/or salt as desired.

When the orzo has finished cooking, drain and transfer it to a serving dish. Pull asparagus from the ice bath, pat dry and add to the orzo. Generously dress the dish, adding additional salt or lemon juice to your liking.

Serve warm or room temp with ample freshly ground black pepper, shaved Parm or creamy goat cheese, scattered arugula leaves or chopped herbs. Although not necessary, I like to give the dish one last squeeze of fresh lemon juice just to bring out the springy brightness.

Enjoy!

serves 4-6

BTW, did you guys read the new piece by Mark Bittman about cooking and eating in Berkeley? I'm happy to see Mark so enjoying California produce and our beloved Monterey Market, but I have to say... I'm scared that the already-insane parking lot situation is about to get much much worse!

FRESH GINGER TEA


I thought about sharing a decadent holiday recipe with you today. After all, this is the time of year for indulgences like Dark Chocolate Peanut Butter Cups with Flaky Sea Salt, Bourbon Braised Short Ribs with Brown Sugar and Coffee, Parmesan Polenta with Garlicky Rapini and Black Olives, and Quick and Easy Peppermint Bark. In the midst of the abundance of decadent fare, I wanted to share something soothing, a simple tool to care for yourself and your loved ones this time of year. (Don't get me wrong, I'm a supporter of holiday indulgence. In fact, if these festive holiday recipes are what you're craving, my cookbook has all of these recipes and more.)

If you feel a little chilled, have a scratchy throat, or harbor a funky belly needing a break from holiday gluttony, nothing soothes like Fresh Ginger Tea with a heaping spoon of honey and a good squeeze of lemon. I'm guessing we could all use a simple treat for ourselves this time of year, an easy quiet moment to catch our breath in the midst of holiday shopping, parties, and crowds.

Happiest of holidays to you all!
xoxo
E


INGREDIENTS
  • 2 ounce nub of fresh ginger
  • 4 cups water
  • honey
  • 1-2 lemons
Peel your ginger then give the peeled ginger a quick whack with a mallet or the flat side of a heavy chef's knife to crush the root a bit, which will allow the flavors to release more easily in the hot water.

Place the crushed ginger in a medium saute pan with 4 cups cool tap water. Bring the water to a boil, then partially cover the pot and reduce heat to achieve a gentle simmer. Set your timer for 25 minutes. After 25 minutes of simmering you should have a flavorful ginger tea that's strong enough to have a nice spicy kick at the back of throat. (If you like your tea even stronger, feel free to let it steep longer.)

Pour the hot tea through a strainer into individual tea cups. Add a heaping scoop of honey ( maybe even a tablespoon or so) to each cup along with the juice of half a lemon. Stir to blend all ingredients and taste for seasoning. Add a little more honey or lemon to your liking and if the tea is a bit strong for you, you can always add a splash of hot water.

Whatever tea you don't drink right away can be stored in a jar in the fridge. I suggest storing strained ginger tea without the honey and lemon added. When you reheat the tea, add the honey and lemon just before serving.

Serves 2-3


MASSAGED KALE WITH POMEGRANATE, PERSIMMON, AND PISTACHIO


I LOVE this salad! I know. I know. Some of you glance a kale recipe and roll your eyes. I get it, we've seen A LOT of kale action over these past few years, but the truth is I'm not done with kale (and I have a feeling I'm not the only diehard fan out there). Plus this salad is so darned good I had to share it here today, even kale skeptics could fall for this one.

If you haven't massaged kale before, really, you should give it a go. Massaging dressing into the leaves transforms hearty, fibrous kale into green goodness that's almost unrecognizably silky and tender (plus you get a little workout). For me, raw kale is totally unpalatable, but massaged kale is heavenly - it's a totally different beast - and a delicious beast at that.

The base recipe for this salad (one of my favorite recipes in my cookbook) is always the same - I think the secret to the dressing lies in the splash of maple syrup, which brings a sweetness that tempers the kale's bitter bite. After dressing the leaves, I always add a few layers of texture, flavor and color. I like pistachios here for crunch (and I think toasted hazelnuts or marcona almonds would be equally delish). In my book, I call for kumquats and dried cranberries, but this time of year I can't resist tossing in my two seasonal obsessions of the moment - pomegranates and fuyu persimmons. They make such delicious companions to the tender kale and help the whole dish feel festively appropriate for the holiday season. I can totally see this dish as a fresh addition to the Thanksgiving table.

One last thing to keep in mind about this salad.... it holds up shockingly well. You can make a batch of massaged kale and eat it hours later or even the next day. Convenient, right?

Wishing you all the happiest of Thanksgivings. Savor that time with your loved ones.

xoxo
E


INGREDIENTS  adapted from Yummy Supper: 100 Fresh, Luscious & Honest Recipes from a {Gluten-Free} Omnivore
  • 2 large bunches kale, lacinato or red are great here
  • 1 tablespoon maple syrup
  • 3 tablespoons fresh lemon juice
  • 1/3 cup extra virgin olive oil
  • 1/4-1/2 teaspoon sea salt
  • 2 firm, but ripe, Fuyu persimmons, peeled and sliced into thin wedges, then cut in half
  • 1/3 cup fresh pomegranate arils
  • 1/3 cup coarsely chopped, roasted and salted pistachios
After washing and thoroughly drying your kale, discard the tough ribs, then tear or chop leaves into smallish pieces. Set aside.

In the meantime, whisk together maple syrup, lemon juice, olive oil and salt in a large salad bowl. Add prepped leaves to the bowl and massage that dressing into the leaves. Don't be shy... really go for it. Massaging the leaves for 3-5 minutes will render the leaves nice and tender. Taste as you go to experience the transformation.

When you're done massaging, taste the salad for seasoning, adding additional lemon juice, salt or maple syrup to your liking.

Enjoy.


serves 6-8 as a small side

P.S. The beautiful black cutting boards in this post were a gift from my buddies at Blackcreek Mercantile. (Thank you Josh and Kelly!) Local folks, run, don't walk to March where you can drool over Blackcreek's stunning new collection of boards, cooking tools, and the perfect step stool.  

MAPLE GLAZED CARROTS WITH CINNAMON, CUMIN, HAZELNUTS + MINT


I gotta tell you guys, this book of mine has taken me on a crazy adventure over the past two months. I found myself hanging out at some great farmers' markets in Portland and NYC, having a lovely lunch with these kind folks on Vashon Island, seeing old friends and family here and here, cooking on TV, teaching photography at this amazing woman's house, giving a Maker Talk, and teaching a class at this incredible spot. Phew.

Having never done so many new things in such a short period, this experience has felt quite surreal. Like many authors/bloggers/photographers, I'm most comfortable writing and cooking at home and looking through the back of the camera lens. As I mentioned in my last post, this whole endeavor of putting a book into the world feels like leaping off a very high cliff over and over again - pretty darned scary, yet exhilarating all at the same time.

I'm a believer in the notion that spring and summer - those seasons filled with sunlight  - are our natural times to go out, run around, be social. Just in the past few days, I've seen the position of the sun shift and the days shorten and I find myself ready to welcome autumn. I'm craving coziness, cooler days, even fog. I want to hunker down with my family, cook big pots of stew, eat porridge for breakfast, dive into long novels and play board games by the fire.

I can't believe I'm saying this, but I'm actually tired of tomatoes, zucchini, and peaches. Instead, I'm jonesing to roast every root veggie imaginable. So here I am today with these delicious Maple Glazed Carrots inspired by Bryant Terry - a local food hero and cookbook author. When I was in Seattle, I bought Bryant's book Afro-Vegan at Book Larder (a fantastic bookshop!) and Paul and I have both been itching to cook from it.  Bryant's carrots, which have just the sort of warm and toasty flavors I'm craving this time of year, seemed like a good place to start.

I think this dish could be amazing for Thanksgiving dinner. (Oh my, could Thanksgiving be a month away? Yikes!)


INGREDIENTS inspired by Bryant Terry's Glazed Carrot Salad in Afro-Vegan
printable recipe
  • 4 bunches baby carrots peeled and trimmed
  • 2 tablespoons melted coconut oil
  • 1 tablespoon freshly squeezed lemon juice
  • 1 tablespoon maple syrup ( + more to taste)
  • 1 teaspoon ground cinnamon
  • 1 clove garlic, minced
  • 1 teaspoon cumin seeds
  • 1/2 teaspoon sea salt
  • 1/4 cup toasted hazelnuts, coarsely chopped
  • fresh mint leaves
Preheat oven to 425.

Scatter prepped carrots onto a medium baking sheet.

In a small mixing bowl combine oil, lemon juice, maple syrup, cinnamon, garlic, cumin, and sea salt.  Slather the flavorful rub over the carrots. Cover the baking sheet with tin foil and stick the pan in the oven. Bake carrots for 10 minutes. Remove foil, give the pan a shake to turn the carrots, and continue roasting uncovered for another 10-14 minutes until the carrots are tender to your liking.

When you take the carrots from the oven, taste for seasoning. Add a bit more salt or lemon juice if you think the carrots need it, or if you're like me and really dig that maple kick, feel free to drizzle another tablespoon of maple syrup over the roasted carrots. Top with the toasted hazelnuts and mint leaves, and serve right away.

Serves 4 as a side dish


PHYLLIS'S RAW ASPARAGUS + FENNEL SALAD

I'm sure those of you who regularly read food blogs are well aware of Phyllis Grant and her bad ass blog, Dash and Bella. Phyllis's writing is funny, raw, heartbreaking, kinetic, passionate... her words can make you belly-laugh and cry all in one sitting. And her food is good, really good.

Back in the summer of 2009 when I started here, I didn't know anyone writing a blog (let alone a food blog) until one day at the market, Sarah an old friend and early reader of Yummy Supper, said... "Hey did you know Phyllis is writing a blog too?" Phyllis and I had gone to high-school together, had always been friendly, but had never known each other well.

Unbeknownst to either of us, Phyllis and I started our blogs within weeks of one another, each of us cooking, photographing and writing in our own kitchens on either side of Berkeley. After running into Sarah at the market, I rushed home to check out Dash and Bella and I was immediately hooked on Phyllis's stories, photos, and recipes. I reached out to Phyllis right away, and we quickly fell into what my husband calls our "blogmance." For nearly 5 years, Phyllis and I have chatted on the phone for hours at a time, talking about geeky blogging stuff that honestly none of my non-blogging friends would want to hear. Our conversations wander from recipe developing to parenting, aperture to marriage, book writing to home birth. Phyllis has become one of dearest friends and I'm grateful to have had her insights and support throughout this crazy adventure.

...................

I first made Phyllis' asparagus fennel salad way back in 2010 when Dash and Bella was still in its infancy and I haven't been able to forget how good it tasted. When I asked Phyllis if she minded if I shared her salad here, she said she had forgotten all about the recipe. What?! I told her, "This salad is way too good to be forgotten!"

With asparagus reining as queen of the market these days, I want to eat it every which way while the season lasts. I like that Phyllis leaves the asparagus raw in this salad, combining the slivers with shaved fennel, Parmesan and a dressing that packs a serious punch.


INGREDIENTS from Phyllis Grant's Dash and Bella
printable recipe
  • 1 shallot, minced
  • 1 teaspoon champagne or white wine vinegar
  • juice and zest of 1/2 Meyer lemon (any lemon will do here)
  • 1 tablespoon capers
  • 1 anchovy, chopped fine (Vegetarian friends: leave out the anchovy. The dressing will still be packed with flavor.)
  • 2 teaspoons Dijon mustard
  • 5 tablespoons olive oil
  • 12 stalks of asparagus, rough ends trimmed
  • a medium fennel bulb (core and stalks removed) + fronds
  • flaky salt and freshly ground black pepper
  • Parmesan, Piave or Reggiano
  • optional: serve on a bed of steamed quinoa

First, whip up your dressing: Combine shallot, vinegar, lemon juice and zest, capers, and anchovy. Set aside for 10 minutes. Then, add mustard and finally whisk in olive oil. Feel free to adjust seasoning with additional lemon juice or olive oil to taste. Set aside. Keep in mind that the dressing can be made (even a couple of days) in advance.

Cut asparagus at an angle into very thin slices. (Phyllis suggests peeling asparagus stalks until just before the tip. If you are using tender young asparagus, the peeling isn't necessary. ) Place asparagus slices in a serving dish. Slice fennel as thinly as possible, using a mandolin if you've got one. Toss the fennel slivers in with the asparagus.

Generously dress the asparagus and fennel. Season with flaky sea salt and freshly ground black pepper to taste. Top with a few feathery fennel fronds, plenty of shaved Parm. Serve immediately. (Any leftover salad dressing can be stored in the fridge for up to a week.)

The salad would be beautiful served with grilled fish or lamb chops for dinner, and for lunch, I like nestling the salad on top of quinoa, adding an extra splash of dressing and savoring the party of textures and flavors.

SUPER SIMPLE RADISH SALAD WITH CREME FRAICHE


A few months back, Paul and I went to a dinner at Camino celebrating David Tanis' latest book, One Good Dish. The entire meal was delicious, but I haven't been able to stop thinking about one brilliantly simple dish that really spoke to me. Radishes - any sort you can get your hands on - are thinly sliced and topped with a dollop of crème fraîche, nice salt and ground black pepper. Crisp, tangy, creamy, salty all at the same time...yes!

If you can find them, I suggest using a variety of radishes in your salad. At Monterey Market, I picked up standard red beauties along with watermelon and black radishes - each added its own distinct flavor and texture.

INGREDIENTS adapted from David Tanis's One Good Dish
printable recipe
  • 1/2 pound radishes
  • 1/4 cup crème fraîche (see my recipe for homemade crème fraîche)
  • optional: a few drops of milk, water or cream
  • sea salt and freshly ground black pepper to taste (I also like smoked salt as as substitute for the salt and pepper - it's delish!)
Get out your sharpest knife, or mandolin, and slice radishes as thin as possible. With bigger radishes like watermelon or black, you may want to halve or quarter the rounds. Scatter radishes onto individual plates or a larger platter.  Whisk crème fraîche with a few drops of liquid to make it a little loose. Scoop a generous dollop of the runny crème fraîche onto the radishes. Sprinkle smoked salt, or sea salt and freshly ground black pepper over the entire dish. That was easy, right?


Serves 4
  
The days are getting longer, birds have returned to our garden, our fruit trees are leafing out, and asparagus has come to the farmer's market. I don't know about you, but I get a jolt of childlike glee every time I see a new sign that spring is on its way! 

QUICK HOMEMADE RICOTTA + A LEMONY GARDEN PASTA

I hear the old lock click as the gate to our backyard squeaks open. Footsteps cross the gravel. The garage door springs open wide as Otis tucks his bike away for the afternoon. Backpack strapped on, my thirteen year old marches through the back door chittering and chattering about his life. I especially love it when the first words from his mouth spill out stories about what they cooked in Kitchen that day.

Otis's after-school tales seem to begin mid sentence, as if he is simply continuing our conversation left dangling that morning. It usually takes me a minute of two before I get the gist of what he's telling me, "...food science...heat and acid...so easy..." When I finally realize that Otis and his classmates had made ricotta that day and that he wanted to make it with me, "Of course, I'd love to!" I answer and we make ricotta right then and there.

Otis and I first made ricotta together a month or so ago and he was right - it is ridiculously easy to make and totally empowering for any do-it-yourselfer. Have you made your own ricotta? I'm guessing a lot of you have, but for those of you who haven't...you must give it a go!

QUICK RICOTTA inspired by the Edible Schoolyard
printable recipe
  • 2 cups whole milk
  • generous pinch of sea salt
  • 2 tablespoons fresh lemon juice
Pour milk into a non-reactive saucepan. Add a pinch of sea salt. Bring milk to a boil, stirring occasionally to prevent the milk from scalding. When the milk comes to a boil, remove the pan from the heat, add the lemon juice, and stir very gently until curdles begin to separate (this should take less than a minute). Let the milk mixture sit in the pan for 5 minutes.

Finally, pour your milky mixture (curds and whey) through a cheesecloth stretched over the top of a bowl. Discard the excess liquid. (Save the liquid (whey) to use in your next batch of porridge, smoothie, biscuits, pancakes, etc... or if you're like my friend Margi, you can take a bath in the stuff;))

You can serve the ricotta immediately or let it continue to strain for up to an hour depending on how dry you like your ricotta.


That's it. Ricotta done!

There are all sort of wonderful resources for making ricotta.  If you want to read more, check here, here and here...
...........................................


LEMONY GARDEN PASTA WITH FRESH RICOTTA
printable recipe

We were in Bolinas staying at my mom's over the long weekend and Otis and I made another batch of ricotta yesterday morning. I decided to make an early lunch putting our fresh cheese to good use. Mom had broccoli sprouting in her garden, lemons finally ripening on her tree, and we had ricotta.... a bright, lemony veggie pasta seemed the thing.
  • 6 loosely packed cups broccoli florets (I think asparagus could be wonderful in this pasta in the spring time)
  • 1/3 cup good olive oil + a drizzle for serving
  • sea salt
  • 1 package dry pasta of your choice {GF folks: I used Bionaturae spaghetti}
  • zest and juice of 2 lemons
  • handful toasted pine nuts
  • ground black pepper
  • red pepper flakes 
  • fresh ricotta (see recipe above)
  • optional: broccoli blossoms
Heat pasta water in a large stockpot. Add plenty of salt until it tastes like sea water.

Blanch your broccoli florets in the hot pasta water. Use a slotted spoon to remove the vibrant, tender veg and transfer them to a large mixing bowl. Toss broccoli with 1/3 cup olive oil and salt generously to taste. Set aside.

Return the water to a boil and cook the pasta until tender. While pasta is cooking, zest and juice lemons and set aside.

Add pasta to the broccoli florets, toss and immediately add pine nuts, lemon zest and juice to the mix. Season generously with salt and freshly ground pepper to taste. If you think it needs it, add a little more lemon juice. Give the whole thing a sprinkling of red pepper flakes, if you like a little spice. Finally scatter fresh ricotta onto the pasta and give the whole dish another drizzling of olive oil. Add a few broccoli blossoms if you've got them.

Serve pasta warm or at room temp.

Feeds 4.

POMEGRANATE GRANITA

Granita. I'm a sucker for sparkly jewel-toned shards of delicious ice.

Light, refreshing, and super easy to make, granitas are my go-to dinner party dessert. While I do enjoy granitas in the heat of summer, I actually prefer them after heavy winter fare, when a rich dessert just feels like too much. This pomegranate granita would be wonderful after a hearty veggie stew, a feast of succulent roasted meat, or even Thanksgiving dinner.

Pomegranates have a tangy, tannic, earthy flavor which I find mysterious and totally irresistible. Straight pomegranate juice can be quite intense so I've added orange juice and zest to mellow things out just a bit, and the extra layer of flavor adds a wonderful citrusy brightness to the dessert.

We all need an easy recipe (which can be made in advance) to help out with the holidays, right?


INGREDIENTS
printable recipe
  • 3 cups unsweetened pomegranate juice
  • 1/3 cup tap water
  • juice and zest of one large orange or two smaller satsumas
  • 1/2 cup light agave nectar
  • optional for serving: candied orange peel; whipped cream with a splash vanilla extract & sweetened with powdered sugar or agave
In order to thoroughly integrate all ingredients, vigorously shake up pomegranate juice, water, orange juice, zest, and agave nectar in a large lidded jar or old milk bottle (you can also use a mixing bowl and whisk if that's easier for you).

Transfer liquid mixture to a baking dish and place it in the freezer. Every hour or so, remove the dish from the freezer and scrape the solid bits with a fork. After a few hours of freezing and scraping, your granita will be ready to serve. (Keep in mind that the shallower the baking dish and more spread out the liquid, the quicker the chill.) If you forget to scrape the granita regularly and end up with a frozen block of pomegranate ice, go at it with a fork until you have a beautiful flaky consistency.

If you are a serious pomegranate lover like my kids are, serve little glasses of this granita all on its own. You can also top it with candied orange peel, or keep in mind that the granita is absolutely delicious topped with billowy sweet whipped cream.

Once it comes out of the freezer, granita melts quickly - be sure to eat it immediately after serving.

Serves 6-8. Keeps in the freezer for 2 weeks.


KALE WITH JAPANESE SESAME DRESSING

Sesame dressing seems to make everyone gobble down heaps of greens with abandon. This flavorful dressing is easy to make and it quickly transforms simple blanched kale or spinach into an irresistible dish.

A few months ago, one of our favorite restaurants closed. O Chame and their fresh, soulful Japanese food always made our family happy - after decades of belly-warming meals, we were heartbroken to see it go. O Chame's blanched spinach with sesame dressing was a perennial favorite. (I have to say... there's nothing more satisfying than watching kids devour a huge plate of greens, only to ask for more!) I've been working on tweaking the flavors for my own sesame dressing for a while now - I even consulted my friend Doug who did a stint working at O Chame. 

For you loyalists out there, this dish will not taste exactly like O Chame's beloved sesame spinach, but the flavors should make you nostalgic, for sure. While sesame dressing is traditionally served with blanched spinach, I really enjoy using heartier kale as my greens here. Give it a try...either way, it's darned tasty.

Do you have a Japanese sesame dressing recipe to share? I'd love to hear about it!


A note on ingredients: I suggest looking for toasted white sesame seeds, Mirin, tamari, and rice wine vinegar at your local Japanese/Asian market.

INGREDIENTS
printable recipe
  • 1 1/2 -2 pounds kale, tough ribs removed - spinach is also delicious
  • 1/2 cup toasted white sesame seeds (if you can't find toasted seeds, you can buy raw sesame seeds and quickly toast them yourself)
  • 3 tablespoons Mirin (sweet sake for cooking)
  • 2 tablespoons GF Tamari or soy sauce
  • 1 tablespoon unseasoned rice wine vinegar
  • optional: 2 teaspoons light agave nectar (I find kale likes this extra hit of sweet) 
  • optional: if you are the type of person who happens to have dashi on hand, add a splash or two to the dressing

Heat a large pot full of water for blanching the greens.  

In 2 batches, blanch kale leaves in unsalted water for a 1-2 minutes until greens are tender and vibrant green. The age, size and heartiness of your kale will determine how long you'll need to cook the leaves. After about a minute of cooking, I pull out a leaf to start tasting for doneness. (Keep in mind that spinach should only need 20-30 seconds to blanch.) Use tongs to remove blanched greens from the hot water.

Let your cooked greens cool to room temp in a colander while you blanch another batch. Place the second batch of cooked greens into the colander to cool with the first batch. (If you have a garden, save your blanching water. Let it fully cool, then use that nutrient-rich liquid to water your plants.) 

While the greens are cooling, go ahead and make your dressing. Using a mortar and pestle or food processor, blend toasted sesame seeds, Mirin, Tamari, rice vinegar, and agave. It's easier to achieve a creamier consistency using a food processor, but sometimes I prefer the therapeutic labor of a mortar and pestle.


When the kale has cooled to room temp, grab half of the greens and squeeze them between your hands to removed excess liquid. The cooked greens will stick together in a log-shaped clump after being squeezed together in your hands. Take that roll of greens and slice it into 1/2 inch wide strips then transfer chopped leaves to a mixing bowl. 

Before dressing your salad, keep in mind that this recipe gives you a VERY generous amount of dressing. You may only need to use as little as half the dressing. (Feel free to save the remaining dressing in a lidded container in the fridge for another batch of greens.) We like a ton of dressing on our kale, so we use it all in one go. Toss greens and dressing with your hands to fully coat the leaves with the toasted sesame goodness.


This dish can be served at room temp or slightly chilled. It also travels well.  

Serves 4 

FIG TARTLETS WITH HERBS + HONEY


Figs are on my mind.

A quick glance out our kitchen door and you see a massive fruit tree, our very happy fig. No matter how we trim it back, hack at it, attempt to tame its exuberance, the tree just grows, thrives and reaches for the sun. Early fall is its time of glory.

Our resident squirrel fights me for every fig that ripens on our tree. (I admit... I do a little cheer whenever I win the battle.)  Needing so much fruit for these tarts, I didn't have enough backyard figs on hand. Thankfully, Monterey Market's plenty came to my rescue with these delicious black mission beauties.

Today's fig tartlets are not quite sweet and not quite savory, living in a delicious realm in between. The cream cheese and crunch of cornmeal in the crust tease out the earthy quality of the figs, and a drizzle of honey heightens the fruit's juicy, natural sweetness.

I'm always a fan of recipes that work any time of day and these tartlets are wonderful for breakfast, tea, an appetizer, or a not-too-sweet dessert.


INGREDIENTS makes 4 medium tartlets (I think each tartlet could feed two to four for dessert or tea, though I wolfed down an entire tartlet for breakfast one day. No problem.)
printable recipe

Note: Be sure to give your dough at least an hour to chill before assembling your tarts.

DOUGH: adapted from Annie Somerville's recipe, via Janet Fletcher's lovely piece in Sunset Magazine's August 2013 issue
  • 1/4 cup masa harina or corn meal
  • 1 cup all purpose flour {GF folks: as per usual, I use Pamela's Bread Mix}
  • generous pinch of sea salt
  • 4 tablespoon cold, unsalted butter cut into small pieces
  • 8 ounces cold cream cheese
TOPPINGS:
  • 24 figs small-medium figs (1 1/4 pound)
  • about 4 teaspoons honey
  • about 4 teaspoons creamy goat cheese
  • a dozen fresh thyme sprigs
In a food processor, mix together masa harina/corn meal, all purpose flour, and salt. Add the butter and blend until you have a coarse, crumbly texture. Finally, add the cream cheese in little chunks. Let the processor whir, until a ball of dough forms.

Lay four squares of plastic wrap on the counter next to your food processor. Divide the dough into 4 balls of the roughly the same size. Wrap each ball of dough in plastic and use the heel of your palm to flatten the dough into 4 round disks. Refrigerate for 1 hour or up to 3 days.

After your dough has chilled, preheat the oven to 375.

On a lightly floured surface with a lightly floured rolling pin, roll out each ball of dough into a 7 inch round. Transfer prepared crusts onto one or two parchment-lined baking sheets, and roll edges of the dough up and over, making a small border.

Trim stem ends from figs and slice the fruit vertically into 1/8 inch rounds. Lay the fig slices in an overlapping circular pattern on top of the prepared dough. Drizzle a little honey over the figs. Crumble on a bit of goat cheese. Tuck in a few sprigs of thyme.


Pop the tartlets into the hot oven. Bake for 15 minutes, then rotate the baking sheets to ensure an even baking. Bake another 15-20 minutes until the crust is golden brown and the figs are soft and oozing with jammy goodness.

Eat warm or at room temp.

Enjoy!


KITCHEN VISIT: BOULETTE'S LARDER + BOULI BAR


For years now, I've been wanting to venture into the kitchens of chefs and cooks I admire, to take a peek and to share those glimpses (and a recipe of course!) with you here. I can't imagine a better place to start than Boulette's Larder and Bouli Bar.

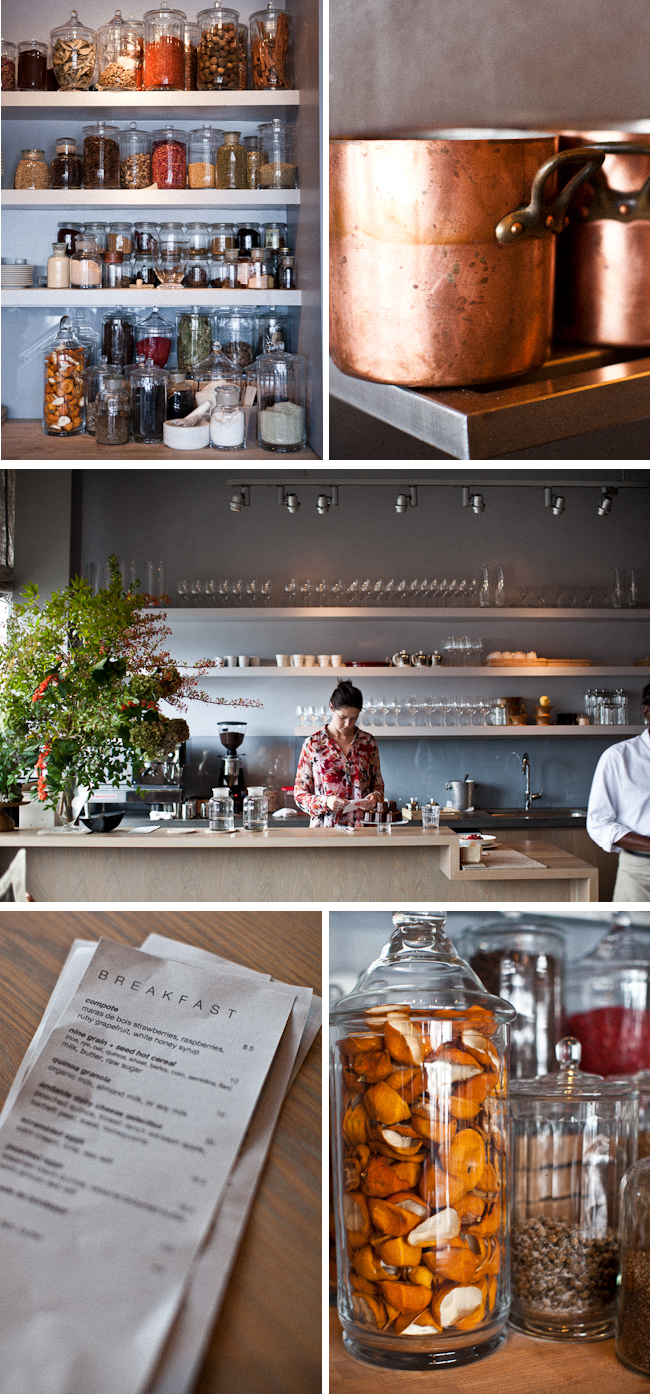
Last Friday, I was lucky enough to be welcomed into Amaryll's kitchen. From the crisp cool maritime light, to the steamy pots on the stove top, bushels of rosy apples, rows of copper pans of every imaginable size, and stacks of jars packed with spices, herbs, and other temptations, this place is magic. 


Boulette's Larder is amongst the favorite restaurants of pretty much everyone I know, and for good reason. There is something ethereal, yet earthy about Amaryll's cooking - her flavor combinations and use of ingredients are unexpected and inspiring, while at the same time her food is always deeply comforting and full of nourishment. For nearly a decade now at Boulette's, Amaryll and her partner Lori have been luring all of us in with cozy breakfasts, delectable lunches, and amazing dinner events. I'm guessing that all of you local Bay Area folks have tried Boulette's, but if you haven't, don't walk, run.

Lori and Amaryll's quiet corner of the SF Ferry Building has become a much busier place over the past few months since they've opened their second restaurant, Bouli Bar right next door to Boulette's. I've eaten a couple of scrumptious lunches since the doors opened and I'm looking forward to many many more. 


Abby, my best friend from high school - co-founder of international architecture firm Kallos Turin - designed Bouli Bar (and the quietly revamped Boulette's). She would be horrified at my gushing, but I can't help myself... the space is stunning. Another friend perfectly described Bouli Bar as modern and clean, yet jewel-like; and I have to say that the space has a freshness completely unlike any restaurant I've seen. There are cozy banquettes, warm communal tables, seating in the atrium of the bustling Ferry Building, while a beautiful brass-clad wood-fueled oven burns at the heart of Amaryll and Lori's new venture. 

Both Bouli and Boulette's feel just right and the food is unbeatable. We're so lucky. 


Amaryll was willing to share some cooking wisdom with me that I had to pass along to you. One of the most irresistible plates of food being served the morning I spent at Boulette's was a bowl of "corn cream" - kind of a fresh corn polenta - topped with buttery scrambled eggs, fresh lime and sea salt. Talk about comfort food!

How do we make this Corn Cream at home? I had to know. Here's the scoop...

CORN CREAM serves 2
printable recipe
  • 4 ears sweet corn
  • 3-4 tablespoons butter
  • sea salt to taste
  • optional: heavy cream
Cut kernels from uncooked corn. Amaryll suggests cutting the kernels in a few phases: first, cut off the kernels at about 1/2 depth; next, slice the remaining corn from the cob; finally, use the back of a knife or spoon to scrape the length of the cob to get as much of the corn milk as possible. (Try doing all of the cutting and scraping of the corn over your blender or food processor, so you don't loose one tasty bit.)

Place cut corn in a blender or food processor. Press the kernels down with a wooden spoon to help release the liquid and to make blending easier. Thoroughly puree the corn for a minute or two until frothy like a cappuccino. (You can also run the corn kernels through a juicer, if you've got one). Feel free to strain the puree through a loose sieve if you want a very smooth texture, but a coarser texture is nice as well.

Pour your puree in a saucepan with butter and a few pinches of sea salt. Warm the corn over low heat, stirring occasionally. The corn will release its starches as it cooks, thickening the puree. The cooking also brings out the natural sugars of the corn, making for an amazing naturally sweet bite.

After only 5-10 minutes of gentle cooking, your Corn Cream will be ready to eat. Feel free to add a little cream for a looser consistency. Season with additional sea salt to taste.

I can imagine endless ways to serve the sweet creamy goodness: with poached fish, sauteed greens, grilled chicken, fried eggs, seared tomatoes.... So many delicious possibilities. 

Trust me, you need Corn Cream in your life.

Thank you, Amaryll.

QUINOA WITH SWEET TOMATOES, GREEN BEANS + BASIL

Even though it has been feeling a bit like winter here in Berkeley - we're talking plenty of fog, wooly socks, gray skies, high temps in the 60s - I know it's summer out there somewhere.

Every time I step into Monterey Market I see edible proof of mid-summer heat. A few weeks back I bought the most tender yellow beans. Peaches are bursting with sweet juices. Melons abound. And a few days ago I saw the piles. The piles of dry farmed Early Girl tomatoes. I smiled, did a little jig, and snatched up pounds of the beauties. For decades, I was committed to heirloom tomatoes, then I discovered dry farmed Early Girls. They don't look too snazzy when you compare them to the heirloom lookers, but man oh man the Early Girl flavor is incredible. Sweet, like candy.

Good tomatoes make this simple dish sing. A quick stint on the stovetop only heightens the sweetness of the tomatoes, then their juices mix with the garlic-infused oil, there's a slight crunch to the parboiled green beans, and the fluffy quinoa soaks up all the juicy tomato goodness and becomes almost creamy like risotto.


This dish is light, relaxed, and summery - it's delicious served with the Slow Roasted Salmon and Meyer Lemon Relish from my last post, or can stand on its own as a nice one-bowl vegetarian option. (Leave out the feta, and we can feed our Vegan friends too!)

The recipe is quite flexible....  You can eat it warm or at room temp. Leftovers are delish, and you can bring this dish to a potluck, or even pack some up for a plane flight as I did a couple of weeks ago. I can't tell you how happy I was at 35,000 feet, passing up airplane food to nibble on this quinoa. Yes, I was strapped into my uncomfortable plane seat, passing the time watching bad TV, but I had freshness in hand and it tasted darned good.


INGREDIENTS
(printable recipe)
  • 1 cup quinoa
  • sea salt
  • a couple of handfuls tender green or yellow beans ( about 6 ounces), rinsed
  • 1 pound dry farmed Early Girl tomatoes or firm sweet cherry tomatoes, rinsed
  • 1/4 cup olive oil
  • 3 cloves garlic, peeled and sliced into thin slivers
  • chopped fresh basil leaves (or micro basil if you have access to it)
  • optional: Crumbled feta

First make your quinoa: Using a fine mesh strainer, rinse quinoa with cool tap water, then place quinoa in a medium saucepan. Cover with 2 cups water and add a pinch of salt. Place saucepan on the stove top and bring the liquid to a boil. Turn down flame to low, cover and simmer quinoa for 15-17 minutes until tender. Let cooked quinoa rest for 5 minutes, then fluff with a fork. Let the quinoa sit in the saucepan while you prep the other ingredients.

The beans: Trim stem ends off beans and parboil them in salted water for 3-4 minutes until vibrant and tender. Immediately spread cooked beans onto a clean dishcloth and allow them to cool a bit before handling. Once the beans are cool enough to handle, slice them into bite-size pieces. Set beans aside while you prep the tomatoes.

The tomatoes: If you are using Early Girls, slice them into 6-8 wedges. If you are using cherry tomatoes, go ahead and cut the cuties in half. ( By the way... do you use a serrated knife to cut your tomatoes? I find that it's so much easier.) Heat olive oil in a medium cast iron or heavy-bottomed skillet over medium heat. Add garlic slivers to the hot oil and let them sizzle for 20-30 seconds, then add tomatoes. Turn the heat up to medium-high and let the tomatoes cook for 2-3 minutes. Take pan from the heat and add the sliced beans to the tomatoes. Salt to taste.

Transfer quinoa to a serving bowl, stir in tomatoes, beans and all the juice and goodies from the pan. Salt to taste. Top with chopped basil and feta.  

If you are planning to take this salad on a picnic or for a work lunch, I suggest adding the feta and basil just before serving.


Serves 2-3 as a main; 4-6 as a side

Psst... Any of you with kids at home, you know that the start of school is fast approaching. If you're anything like me, you are desperate for school lunch inspiration. Katie Morford from Mom's Kitchen Handbook has come to our rescue - when Chronicle sent me a copy of Katie's new book, I was stoked.  Best Lunch Box Ever: ideas and recipes for school lunches kids will love is packed with tasty, healthful lunch ideas. Lilah is already scheming up what she wants from Katie's book. Phew!